本博文对HUMAN3R进行复现。 该工作通过CUT3R实现4D在线重建(三维模型+相机轨迹),在此基础上,恢复全局的多人SMPL-X bodies。
- 本博文复现过程采用的代码及代码注释(如有):My github repository
- 原github:Link
实验配置
测试采用的为4090 GPU.
安装配置
git clone git@github.com:R-C-Group/Human3R.git

#创建环境
conda create -n human3r python=3.11 cmake
conda activate human3r
# conda install pytorch torchvision pytorch-cuda=12.4 -c pytorch -c nvidia  # use the correct version of cuda for your system
# pip install torch==2.5.1 torchvision==0.20.1 torchaudio==2.5.1 --index-url https://download.pytorch.org/whl/cu124
# conda install pytorch==2.5.1 torchvision==0.20.1 torchaudio==2.5.1 pytorch-cuda=12.4 -c pytorch -c nvidia
# pip install mkl==2024.0.0
pip install --index-url https://download.pytorch.org/whl/cu124 torch==2.5.1 torchvision==0.20.1 torchaudio==2.5.1

pip install -r requirements.txt
# pip install --no-build-isolation chumpy
pip install chumpy

# issues with pytorch dataloader, see https://github.com/pytorch/pytorch/issues/99625
conda install 'llvm-openmp<16'
# for training logging
conda install -y gcc_linux-64 gxx_linux-64

# pip install git+https://github.com/nerfstudio-project/gsplat.git
pip install gsplat

# for evaluation
pip install evo
pip install open3d

pip install scikit-image
- 修补cuda核 (PS:这部分可能存在较多的bug,此处的setup.py代码也是经过修复的~)
cd src/croco/models/curope/
# rm -rf build/
python setup.py build_ext --inplace
cd ../../../../

# 若出现cuda不匹配问题,需要在.bashrc中设置一下~
export PATH=/usr/local/cuda/bin:$PATH
export LD_LIBRARY_PATH=/usr/local/cuda/lib64:$LD_LIBRARY_PATH
下载所有的模型以及checkpoints,注意需要先到网站以及网站2进行注册;
此外,还需要科学上网才可以下载到google drive里面的东西 pip install gdown
# SMPLX family models
bash scripts/fetch_smplx.sh

# Human3R checkpoints
huggingface-cli download faneggg/human3r human3r.pth --local-dir ./src
# 此处的下载建议用脚本
- 采用脚本下载huggingface:
python download_huggingface.py
from huggingface_hub import snapshot_download  # 注意这里导入了 hf_hub_download

model_path = snapshot_download(
    repo_id="faneggg/human3r",
    local_dir="/home/guanweipeng/Human3R/huggingface_model",
    cache_dir="/home/guanweipeng/Human3R/huggingface_model/cache",  # 指定缓存目录
    token="hf_******",     # ✅ 在这里传 token
    endpoint="https://hf-mirror.com"   # 如果需要走镜像
)

print("文件下载到本地路径:", model_path)
cp /home/guanweipeng/Human3R/huggingface_model/human3r.pth ./src
- 运行的时候可能遇到加载dinov2失败的情况:
- 首先下载模型,应该是会存放在
/home/guanweipeng/.cache/torch/hub/main.zip,运行ls ~/.cache/torch/hub/facebookresearch_dinov2_main/可以查看 - 然后重新运行,运行前添加:
export TORCH_HOME=/home/guanweipeng/.cache/torch
- 首先下载模型,应该是会存放在
python
import torch
import torch.hub

# 手动下载 dinov2
model = torch.hub.load('facebookresearch/dinov2', 'dinov2_vitl14', pretrained=True, force_reload=True)
推理测试的demo
# input can be a folder or a video
# the following script will run inference with Human3R and visualize the output with viser on port 8080
CUDA_VISIBLE_DEVICES=0 python demo.py --model_path MODEL_PATH --size 512 \
    --seq_path SEQ_PATH --output_dir OUT_DIR --subsample 1 --use_ttt3r \
    --vis_threshold 2 --downsample_factor 1 --reset_interval 100

# Example:
CUDA_VISIBLE_DEVICES=0 python demo.py --model_path src/human3r.pth --size 512 --seq_path examples/GoodMornin1.mp4 --subsample 1 --use_ttt3r --vis_threshold 2 --downsample_factor 1 --reset_interval 100 --output_dir tmp

# CUDA_VISIBLE_DEVICES=0 python demo.py --model_path src/human3r.pth --size 512 --seq_path examples/boy-walking2.mp4 --subsample 1 --use_ttt3r --vis_threshold 2 --downsample_factor 1 --reset_interval 100 --output_dir tmp
结果会存放在output_dir文件夹内(但并没有看到~)
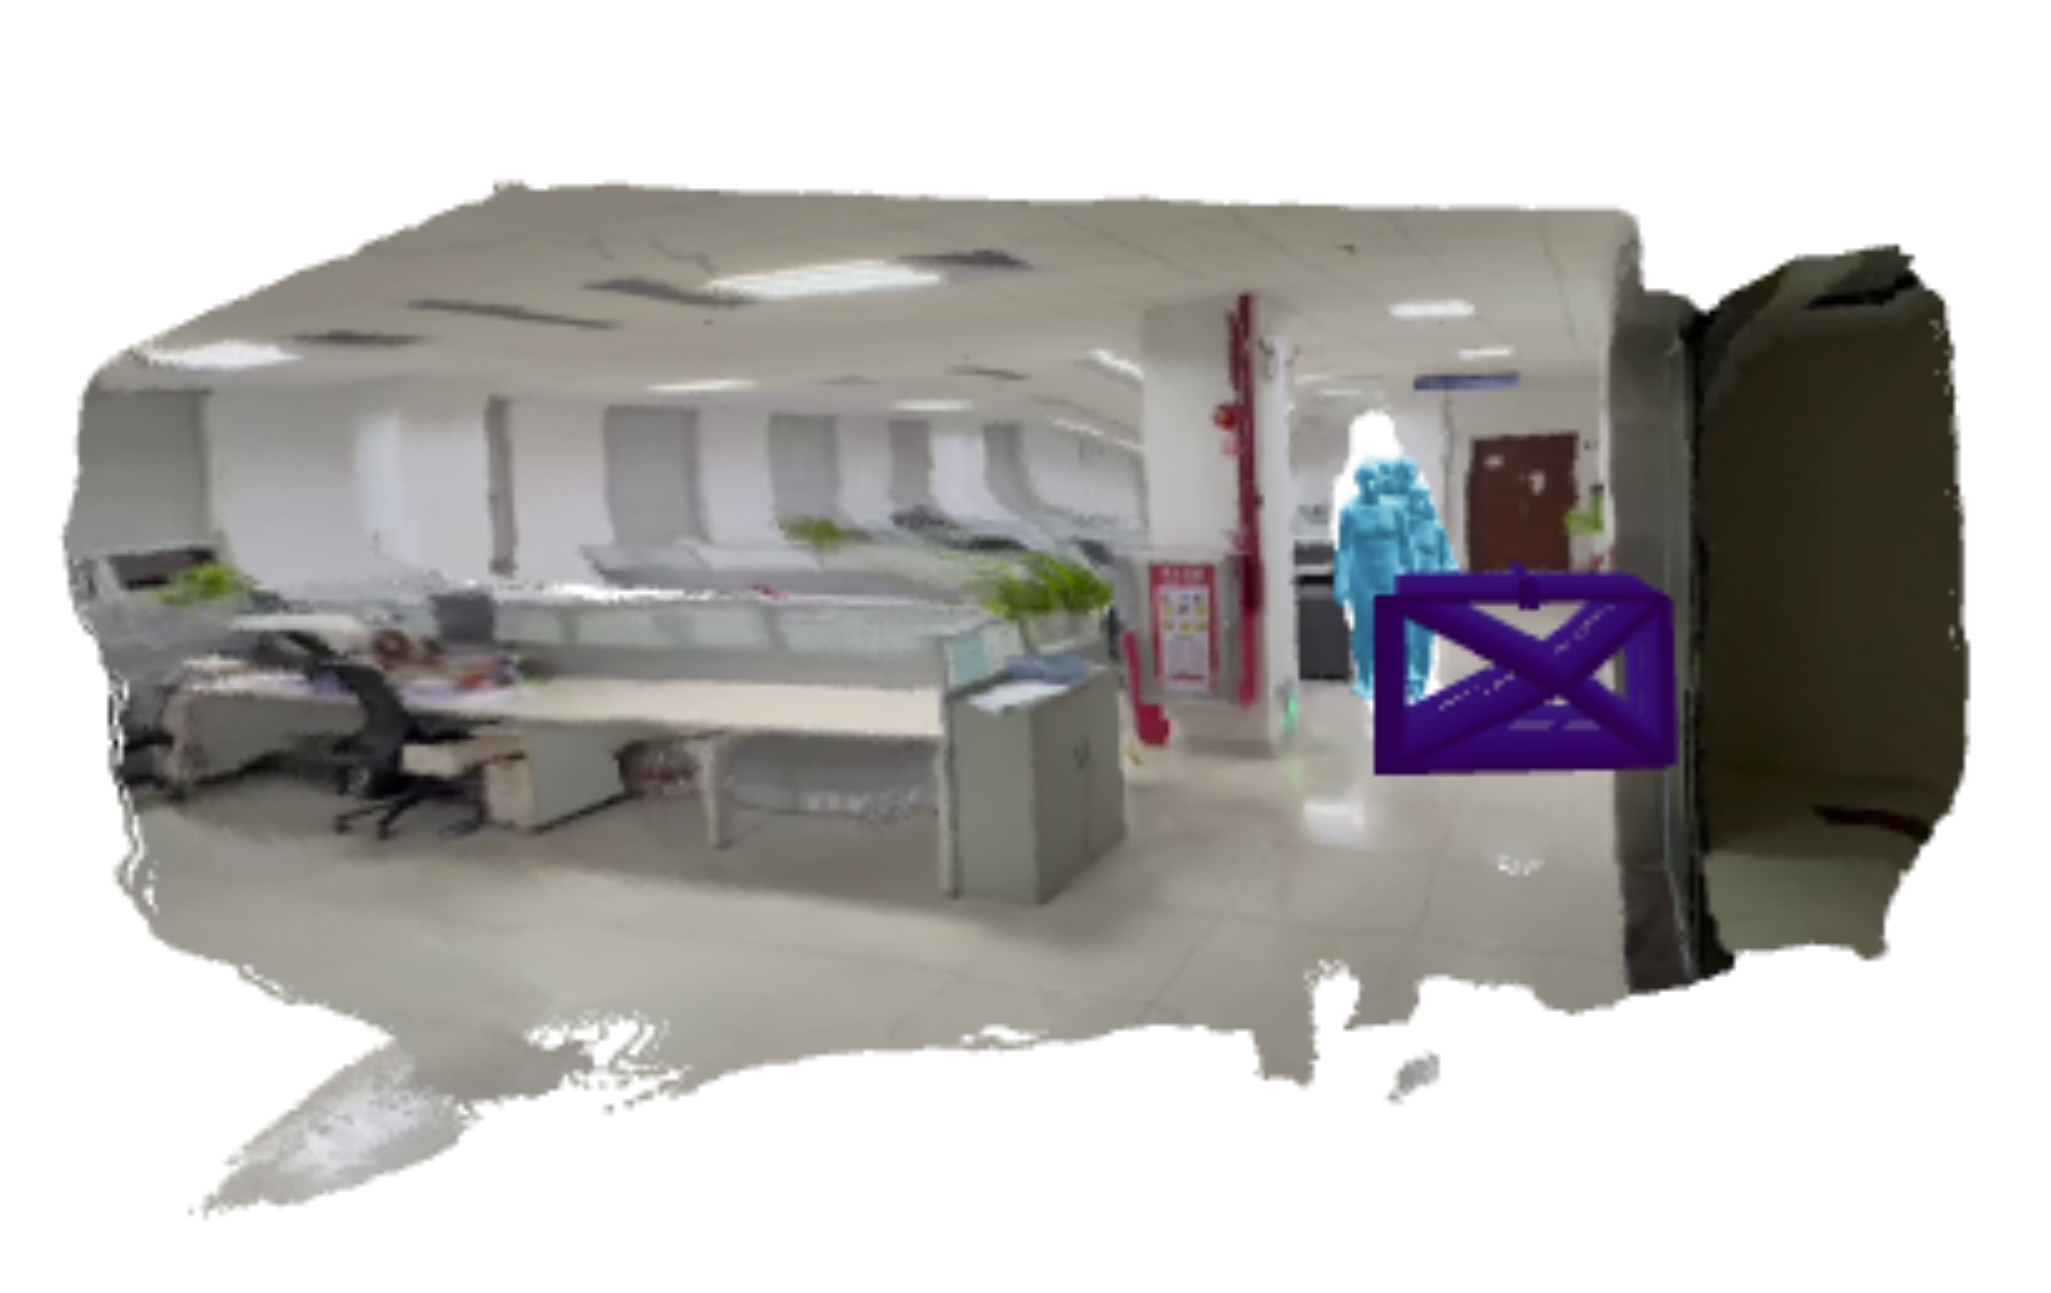
测试效果
由于太卡了,没法可视化整个环境,只能可视化一部分:
Thor上的部署
- 此部分的代码使用thor分支
git clone git@github.com:R-C-Group/Human3R.git

#创建环境
conda create -n human3r python=3.11 cmake
conda activate human3r
pip3 install torch torchvision --index-url https://download.pytorch.org/whl/cu130

#其他配置是一致的

cd src/croco/models/curope/
# rm -rf build/
export TORCH_CUDA_ARCH_LIST="11.0"
python setup.py build_ext --inplace
#注意对代码进行了修改,请使用Thor分支
- 对于是11.0还是10.0应该通过代码查看
python -c "import torch; print(f'PyTorch Version: {torch.__version__}'); print(f'Device: {torch.cuda.get_device_name(0)}'); print(f'Capability: {torch.cuda.get_device_capability(0)}')":
PyTorch Version: 2.9.1+cu130
Device: NVIDIA Thor
Capability: (11, 0)
- 运行前需要下载模型(按上文操作)
ls ~/.cache/torch/hub/
ls ~/.cache/torch/hub/facebookresearch_dinov2_main/
export TORCH_HOME=~/.cache/torch
- 运行demo:
CUDA_VISIBLE_DEVICES=0 python demo.py --model_path src/human3r.pth --size 512 --seq_path examples/GoodMornin1.mp4 --subsample 1 --use_ttt3r --vis_threshold 2 --downsample_factor 1 --reset_interval 100 --output_dir tmp
- 注意Thor由于太新了,对应Pytorch版本也新,原代码可能出现
omegaconf类的错误,此处已经修改代码并放到Thor分支了. pip install nvitop采用nvitop工具查看cpu情况
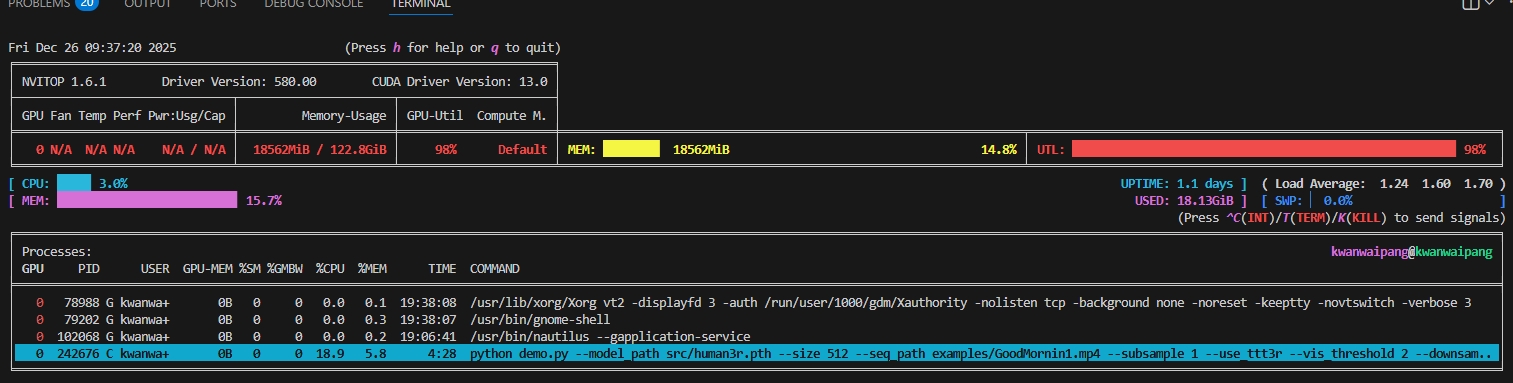
- 资源占用分析:
- GPU 显存占用 (MEM) 仅为 18.5GiB / 122.8GiB
- %GMBW (显存带宽利用率) 18.9%
- 整机 CPU 利用率 3.0%
- %SM (0.0):这是最核心的异常指标。虽然顶部总利用率(UTL)显示 98%,但进程详情中的 %SM(流处理器实际利用率)却是 0。这证实了 GPU 核心并没有在执行有效指令,而是处于某种“指令等待”或“驱动死锁”状态。(关于这点,猜测可能正好截图处于卡在推理某个阶段)
- 推理耗时:Inference completed in 164.99 seconds (average 0.71 s per frame).